Subrogation Is Decided in the First Week
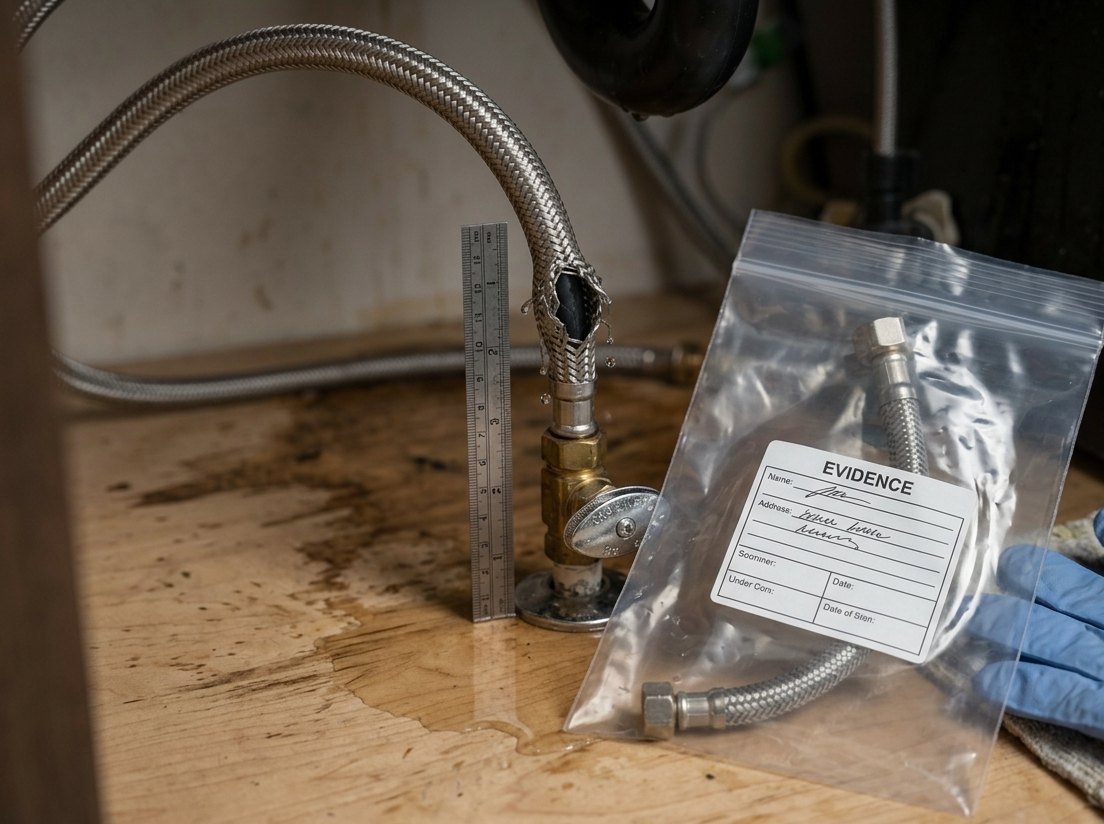
The scenario below is a composite, not any one project. A braided supply line under a third-floor kitchen sink lets go on a Saturday night. By Monday the unit below has wet drywall and a ceiling that has to come down. The mitigation crew cuts, bags and hauls. The failed line, its compression nut and the angle stop go into a dumpster with the drywall.
Eight months later the claim is paid and a subrogation analyst opens the file. The line was a name-brand product and the installer is insured. None of that helps now. There is no part to examine, so nobody can tell whether this was a manufacturing defect, an overtightened nut or a line that got kinked when the dishwasher was pushed back into its bay.
A recovery on a construction or building-system loss rests on two pieces of construction work. The first is causation: what failed, why it failed and whose work or product put the failure there. The second is valuation: how much of what the carrier paid was caused by that failure, as opposed to betterment, code upgrades and scope the insured chose. Both depend on evidence that starts to disappear once mitigation begins and on project records that are easy to get early and hard to get late.
The First 72 Hours: Preservation Without Blocking Mitigation
The insured has a duty to mitigate and the carrier wants it to. Mitigation and preservation can both happen, as long as someone documents and removes the failed component before the demolition crew removes it for you.
- Tell mitigation what not to throw away. The failed component, whatever it attaches to and any fragments stay on site, bagged and labeled, until released. Put it in writing.
- Photograph before anything moves. Start wide, then mid-range, then close-ups of the failure point with a scale. Keep the original files, because many messaging apps strip the date and device metadata.
- Remove the component with its context. Cut the pipe several inches on either side. Do not unthread the fitting, because that changes the thread engagement and the fracture surface. A failed sprinkler head should be tagged in place before it comes out.
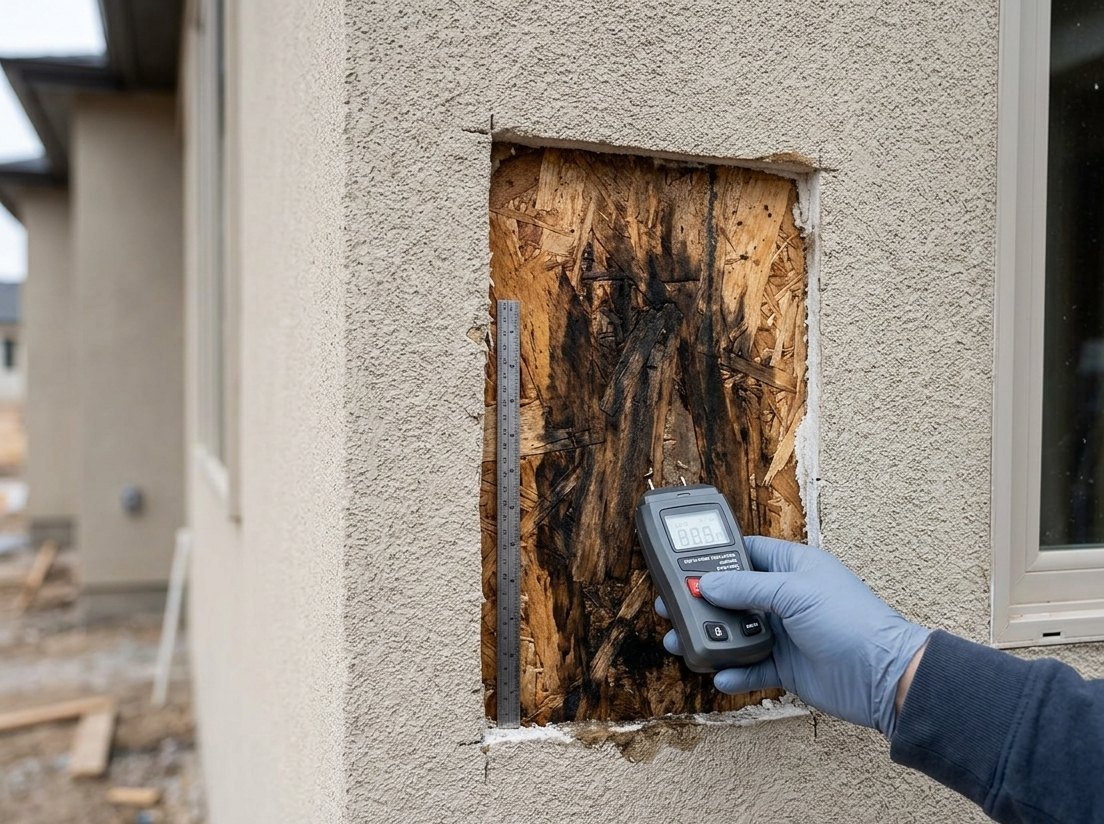
- Record the moisture picture. A moisture map with readings and locations answers the argument that the damage came from a long-running leak. Our sudden versus continuous seepage article covers that distinction.
- Photograph the condition of what got wet. The age, wear and prior damage of the cabinets, flooring and finishes are where the betterment analysis starts later.
- Send notice and preservation letters. Send them to every party you can name from the first walk: installer, general contractor, manufacturer, property manager and maintenance vendor. Say what failed, that it is preserved and that they will be invited to a joint examination before any destructive testing.
- Start the chain of custody on day one. Record who removed it, who has held it and where it is stored. An independent lab’s evidence locker is the best place for it.
Reading the Failed Component
The part is the best evidence in the file. Failure analysis of fittings, valves, heads and connectors is laboratory work: stereo microscopy, scanning electron microscopy of the fracture surface, alloy chemistry and comparison against exemplars. That work separates fatigue from overload, stress corrosion cracking from dezincification and a casting flaw from an overtightened nut. Each of those points to a different party.
The order of the work matters as much as the tools. Two ASTM practices frame it: ASTM E1188, Standard Practice for Collection and Preservation of Information and Physical Items by a Technical Investigator and ASTM E860, Standard Practice for Examining and Preparing Items That Are or May Become Involved in Criminal or Civil Litigation, which addresses testing that could change the evidence. Our article on why ASTM standards matter explains why following them makes the findings harder to attack.
- Document as received. Photographs of every face, markings, date codes and lot numbers.
- Non-destructive work first. Visual and low-magnification examination and measurement of the installed geometry.
- Write the protocol. State what will be cut, where, by whom and in what order. Circulate it to every party on notice before anyone touches a saw.
- Examine jointly. A party left out of the first destructive examination will challenge every finding that came out of it, often with good reason. The fracture surface only gets exposed once.
- Test exemplars. New parts from the same manufacturer and, where possible, the same production period show whether the failed unit departed from the product or behaved like the product.
A part that was handled badly, cleaned or left wet for months can lose the surface features that separate one mechanism from another. A good expert then says the mechanism cannot be determined.
Manufacturing, Design, Installation or Maintenance
The same cracked fitting can be a product defect, an installation error or damage done by someone who worked in the space years later. The evidence that separates them is specific and you find it in different places.
Manufacturing defect
This unit departed from its own design: a casting void, an incomplete crimp or a thin wall. The evidence is in the part itself and in exemplars that do not share the flaw. Keep the supply chain in the file, including the installer’s invoice, the supply house and any packaging.
Design defect
Here every unit carries the risk. Think of a plastic coupling nut that cracks at normal torque or a brass alloy prone to dezincification in local water. That evidence is population-level: other failures, recalls, engineering changes and revised installation instructions.
Check the Consumer Product Safety Commission’s recall listings and the incident reports at SaferProducts.gov early. Manufacturers, distributors and retailers have a federal duty to report information reasonably supporting the conclusion that a product contains a defect which could create a substantial product hazard (15 U.S.C. §2064(b)). A recall does not prove your unit failed that way. It does tell the lab what to look for.
Design can also mean the building design rather than the product: an undersized condensate drain, roof drainage that ponds or a wet sprinkler system in an unheated space. If the installed work matched the drawings and the failure followed anyway, the design professional belongs on the list. I spent years as a project manager and construction administrator working through discrepancies between design teams and general contractors, so I do not assume a failure is the installer’s just because the installer was the last one to touch it.
Installation error
This is the most common recoverable cause. Deformed ferrules, sealant on fittings whose instructions prohibit it, tubing bent tighter than the stated radius, missing supports and unisolated dissimilar metals all point here. The proof is a comparison between the as-found installation and two documents: the manufacturer’s instructions and the code in effect at permit. The next section covers both.
Maintenance failure
Fire sprinklers are the clearest case. NFPA 25 sets the inspection, testing and maintenance regime for water-based fire protection systems. Whether it was followed shows up in the inspection reports, the deficiency notices and what the owner did about them. Ask for the maintenance contract and every service ticket.
A later trade or the insured
Many failures are caused by the last person who worked near the component. A cabinet installer drives a screw through a supply line. An appliance swap kinks a connector. Sometimes the evidence points back at the insured, such as a homeowner-installed replacement or a thermostat set too low in a vacant unit.
Installation Instructions and the Code at Permit
In an installation-error file, the installation instructions are the most useful document. They are also the one most often pulled in the wrong version. Manufacturers revise them, sometimes after a failure mode becomes known. The version that governs is the one current when the work was installed, not the one on the website today. Look in the submittal package, the O&M manuals and archived versions from the manufacturer.
Read them for requirements that leave marks on the installed work:
- Torque or turns past hand tight. Overtightening shows up as crushed ferrules and deformed nuts.
- Sealant or thread tape. Some compression and push-fit connections prohibit it and you can see it when it is there.
- Bend radius and support spacing. Measure them on site before demolition, which is why photographs with a scale matter.
- Compatible materials. Dissimilar metals in contact and fittings used outside their listed material.
The second comparison is the code edition in effect at permit, with local amendments. Washington’s adopted mechanical code, for example, requires an auxiliary drain pan or another listed overflow protection method where overflow from the primary condensate system could damage building components. Local code adoption determines which provisions apply to a given building. Get the adopted edition and amendments from the building department. Do not work from the current model code.
Permit and inspection records fill in the rest. A passed inspection does not prove the work was installed correctly, because inspectors see a sample of the work at one point in time. An uncleared correction notice or work that was never permitted is worth a great deal.
Who Built What and When: Reading the Project Record
Knowing the mechanism is not enough. You still have to tie the failed work to a specific contractor at a specific time. On a new building that trail runs through the general contractor’s files. On an older one it runs through permits, invoices and maintenance history.
These are the records we ask for first:
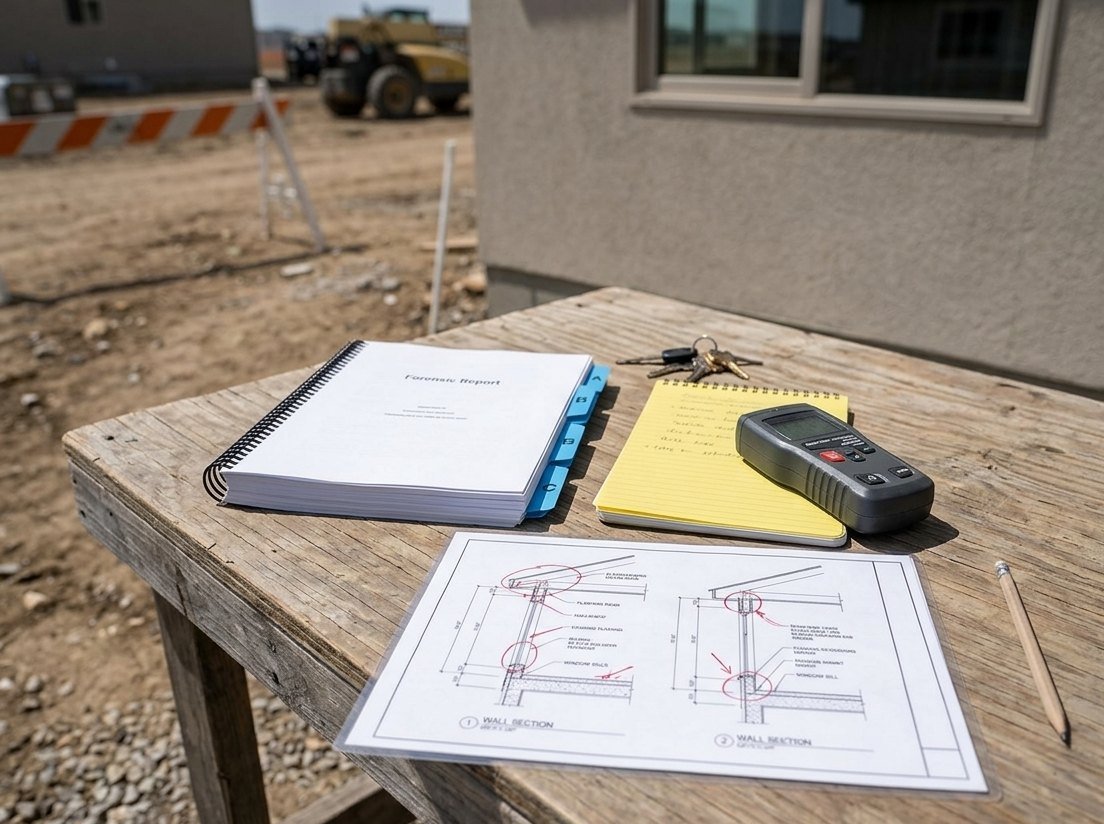
- Subcontracts and scopes of work. These show which trade was responsible for the supply line, the final connection and the appliance hookup. Scope gaps between the plumbing, cabinetry and appliance trades often decide who owns the failure.
- Submittal logs. What was specified, what was submitted and approved and what was actually installed. Substitutions are a frequent source of liability and the product markings on the as-found part are how you catch them.
- Daily reports and photographs. They show which crews were in the area and when. Progress photos may show the connection before close-in.
- RFIs and change orders. Field changes that moved a line or changed a product.
- Pay applications. Which contractor billed for the scope and when.
- Permits and inspection cards. The permit holder, inspection dates and sign-offs for each trade. Later permits for tenant improvements or remodels identify who came back into the area.
- Closeout documents. O&M manuals, warranty letters and registrations, as-builts, the substantial completion certificate and the certificate of occupancy. The completion dates matter for reasons covered below.
- Maintenance and service history. Work orders, vendor tickets and NFPA 25 reports.
- The part itself. Date codes and production markings bracket when the component could have been installed. If the part was made after the original construction, someone else installed it.
Ask for these while the project team is still around. Having worked as project manager on university capital projects, I know closeout documents tend to scatter once the building is turned over and the team moves on to the next job.
What a Sound Causation Opinion Contains
A good causation report lets someone who was not there follow the reasoning from the part to the party. It should cover:
- What was examined and how. Site visits, chain of custody, protocol and attendees.
- The failure mechanism. Supported by the lab findings and photographs and stated at the level of certainty the evidence allows.
- The standard of care. The installation instructions and code edition that applied, with the specific departures found on the as-found work.
- Who did the work. Tied to the project record, not assumed from who the general contractor was.
- Alternate causes considered and ruled out. Product defect, later trades, maintenance and the insured. A report that does not rule out a later trade is half a report.
- What the evidence cannot show. Stated plainly, which makes the rest more credible.
Our piece on when to retain a construction expert explains why the earliest retention is often the cheapest: the expert directs preservation instead of reconstructing it.
Valuation: Separating the Recoverable Portion From Betterment
What the carrier paid under its policy and what the responsible party’s failure actually cost are two different numbers. A replacement cost policy puts the insured back in new condition. The party that caused the loss will argue it owes the value of what was damaged, in the condition it was in. Somebody has to measure that gap line by line.
- Betterment. New cabinets in place of twenty-year-old ones or new flooring in place of worn flooring. The pre-loss condition photographs from the first 72 hours are the evidence here.
- Code upgrades. Ordinance or law coverage may have paid to bring unaffected work up to current code. The responsible party did not cause the code change.
- Pre-existing or unrelated damage. Old staining, earlier leaks and rot that predates the event.
- Discretionary scope. Matching undamaged areas, upgrades the insured chose during repair and work in rooms the water never reached.
- The failed work itself. Replacing the defective fitting or flashing is a different category from the ceilings, finishes and contents it ruined. Our CGL defective work versus resulting damage article explains why that split matters to the target’s insurer.
This part is estimating work. Early in my forensic career I produced repair cost estimates for construction defect cases and the approach I use is the same one. Tag each line item of the paid estimate by category as it is written or reviewed: caused by the failure, betterment, code upgrade, unrelated or discretionary. Support each betterment line with the age and condition of what was replaced and a stated basis for the adjustment. Tie every caused-damage line to the moisture map or fire pattern.
Our article on the quantum approach to damage valuation covers building a figure that holds up to review.
Legal Barriers in Brief
Legal barriers can close a file regardless of the construction evidence and counsel decides how they apply. Our job is to hand counsel the facts those rules turn on.
- Contract waivers of subrogation. Standard AIA general conditions, including A201-2017, contain a mutual waiver of subrogation between owner and contractor for losses covered by property insurance. The contract actually signed controls, with its edition and any modifications. The construction record supplies that contract and the dates.
- The carrier’s own insured. Check whether the target is also an insured under the policy that paid, such as a builder’s risk policy. The named insured schedule and any additional insured provisions answer that question and counsel decides what it means for recovery.
- Time limits tied to project milestones. Some limitation periods run from construction dates. Florida Statutes §95.11(3)(b), for example, sets a seven-year outside limit that runs from the earliest of the temporary certificate of occupancy, the certificate of occupancy, the certificate of completion or abandonment of construction. The expert needs to establish those dates accurately from the project record.
- Pre-suit notice procedures. Some states require notice and an opportunity to inspect or repair before a defect claim proceeds. Counsel will say whether one applies.
A Construction-Side Screening Checklist
When a file comes in, these are the questions we work through:
- Is the component preserved? If not, do the photographs show the failure point clearly enough for an expert to work from?
- What does the part show? A manufacturing flaw, a design weakness, installation marks, wear from neglect or damage from later work.
- Who touched it? The installer, the contractor, later trades, the maintenance vendor or the insured.
- What did the instructions and the code require at installation? Use the versions that applied at the time.
- What does the project record show? Scope, submittals, permits, inspections, pay applications and closeout dates.
- What contract and insurance documents exist? Get them to counsel early, along with the completion dates.
- What is the recoverable number? The paid amount less betterment, code upgrade, unrelated and discretionary scope.
What to Do With This
If you take first notice or adjust the loss, the preservation instruction to the mitigation contractor is the most valuable sentence in the file. Say it on the first call and write it on the work authorization. Photograph the condition of what got wet before it is torn out. Send preservation letters within days, not after the claim is paid.
On the subrogation side, bring the construction expert in while the part is still in the lab bag, before anyone has examined it alone. Ask for the protocol, the parties to notify and the records to request. Get the contract, the named insured schedule and the completion dates in front of counsel before you spend money on destructive testing. Counsel should give the expert the fullest project record available, including later permits and maintenance history, not just the paid estimate. Then ask what the part shows, what the instructions and code required at installation, which alternate causes were ruled out and what the evidence cannot establish.
My advice to estimators is simple. Tag betterment, code upgrade, unrelated and discretionary line items when the estimate is written.
A Note on Sourcing
PCC is a construction forensics and construction management firm, not a law firm. On subrogation files our work sits on the causation and valuation side: what failed, why, whose work it was and what the resulting damage is worth. The legal references in this article are here only as context for that construction work. Rely on your counsel for how any rule applies to a particular loss.
Standards, statutes and code provisions were checked against the issuing organizations and official government sites as of September 2026. The AIA waiver of subrogation is described in general terms only. Read the contract actually signed.
This article is a general informational overview, not legal advice and does not create an attorney-client or expert-client relationship. Rules and case law change. Confirm current applicability with qualified counsel in the relevant jurisdiction before relying on anything described here.