Mold Is a Symptom of Water
This scenario is a composite, not one project.
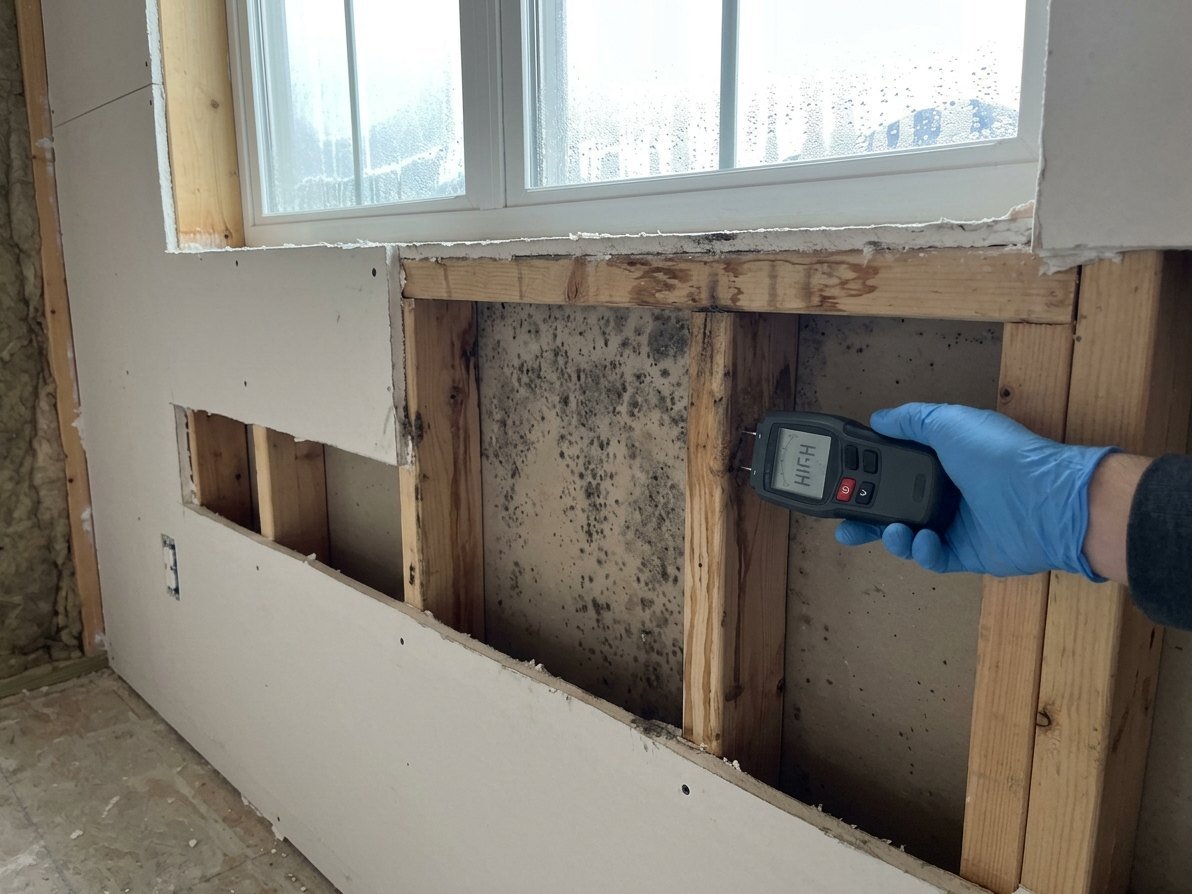
Three years after closing, a homeowner in a newer tract pulls a dresser away from an exterior bedroom wall and finds dark growth on the baseboard and the lower drywall. The HOA gets a call. The builder gets a letter. Soon everyone argues about mold.
Mold growth requires moisture. EPA puts it plainly: “The key to mold control is moisture control.” The investigation identifies whether the moisture came from water intrusion, plumbing, condensation, high indoor humidity, wet materials enclosed during construction or another source. A window flange that was never lapped correctly is a construction problem. A humidifier running in a closed room with furniture against a cold wall is a use problem. Sometimes it is both.
This article is about the building-side investigation, not a liability answer. It covers how an investigator traces that water, separates construction causes from occupant use and maintenance and documents the answer. Then it gives brief context on California’s Right to Repair Act.
Where the Water Comes From in a Newer Home
Water rarely shows up where it gets in. It runs down the back of the building paper, along a sill plate or under the flooring and appears somewhere else. The first job is to trace it back.
On the construction side, these are the sources that come up most often in newer homes:
- Windows and doors. Flashing that is out of sequence, missing sill pan flashing, sealant used in place of a lapped membrane or a door threshold set without a pan.
- Decks and balconies. Waterproofing that ends short of the wall, missing or reversed flashing at the door and flat slopes toward the building. See our balcony inspections.
- Roofs. Penetrations, valleys, wall-to-roof intersections and missing kickout flashing where a roof edge dies into a wall.
- Stucco and exterior walls. Weather-resistive barrier laps, weep screeds buried by hardscape and openings cut through the barrier for utilities.
- Shower pans and tile waterproofing. Pans that fail at the drain or curb and waterproofing that stops short behind the tile.
- Plumbing. Supply and drain leaks inside walls and slabs, including fittings that were damaged during construction.
- The slab. Vapor coming up through the slab under flooring or at the bottom plate.
- Wet framing closed in. Lumber that got rained on and was covered with insulation and drywall before it dried.
On the occupant side, the usual sources are different. Indoor humidity from cooking, showers without the exhaust fan running, drying clothes indoors or a humidifier. Condensation on cold surfaces, especially behind furniture on exterior walls and in closets. Irrigation spraying the wall or soil built up above the weep screed after new planting or hardscape. Clogged gutters and downspouts. Caulk and grout that were never maintained. Plumbing fixtures the owner replaced. Most of those leave a different pattern than a construction leak.
I spent years on the construction side as a project manager and construction administrator, walking jobsites and working through RFIs and submittals between design teams and contractors. Schedule pressure to close walls is real. Framing that was rained on is supposed to dry before it is covered. When it is not, the result can look a lot like a leak years later. Framing moisture readings taken before insulation settle that question, when they exist.
How an Investigator Separates Construction From Use
Construction leaks and use-related moisture tend to behave differently. The work is to read the pattern and then prove it.
Pattern and Location
Moisture from a failed window or deck door tends to concentrate below the opening and spread downward and sideways from a point. It usually gets worse after rain. Condensation tends to follow cold surfaces: the lower corners of exterior walls, closet walls and the backs of furniture. It tends to track the season and the way the house is used. A shower pan leak shows up on the other side of the shower wall or below the curb and gets worse with use, rain or no rain. A slab vapor problem tends to show at the flooring and the bottom plate across a wider area rather than at one point.
Timing and Weather
We compare when the problem shows up with rainfall records, irrigation schedules and how the occupants use the rooms. A wall that is wet in August after no rain for months is pointing away from the window. A wall that is dry in summer and wet after every storm is pointing toward it.
Moisture Mapping and Opening Up
A moisture map on a grid, with dry reference readings from unaffected areas of the same materials, shows where readings peak. Thermal imaging helps, but a cold spot can also be missing insulation, so confirm every anomaly. When the map points to a location, small inspection openings at the source, at the edge of the wetting and at a dry control show what is behind the finish: the sequence of the barrier laps, the condition of the flashing, the sheathing and the framing.
Water Testing
Where a window, door, deck or wall assembly is the suspected source, field water testing can reproduce the leak under controlled conditions. On our water intrusion investigations, field water testing is done by an independent testing agency that PCC coordinates. The test is designed around a question: does this assembly leak under these conditions and where does the water go when it does.
Interior Conditions
Indoor temperature and humidity, exhaust fan use and HVAC operation all bear on condensation. A few weeks of humidity logging during normal use tells you more than any single reading. Two of the Right to Repair Act standards discussed below turn on excessive condensation getting into the structure, so this data matters.
Plenty of files have more than one source, such as a marginal window detail and a very humid bedroom. The report should say so and, where the evidence allows, which one is doing most of the damage.
Documenting It So It Holds Up
Whatever the answer, it needs to be documented in a way the other side can check. A defensible investigation usually follows this sequence:
- Photograph before touching anything. Record the growth, the finishes and the room as found, including furniture placement and any humidifiers or dehumidifiers.
- Pull the records. The purchase documents, the builder’s homeowner manual and maintenance schedule, warranty requests, HOA maintenance logs, prior repair invoices and any photos taken during construction.
- Map moisture with references. Grid readings on a dimensioned sketch, dry references from the same materials and a note on whether any drying or remediation has already started.
- Open with a plan. Choose opening locations to answer a question about the source. Photograph each layer as it is removed.
- Test the suspected assembly. Water test windows, doors, decks or walls where they are the suspected source and record the conditions of each test.
- Preserve what is removed. Keep failed components and representative sections of damaged material, label and log them and give interested parties notice before destructive testing. See why ASTM standards matter in forensic investigation.
- Report the source and the basis. Name each source, the evidence for it and against the alternatives. Say what the evidence cannot establish.
Early in my forensic career I prepared repair cost estimates for construction defect cases. The estimates that held up tied every line to an observed condition. Do the same here. Put the flashing repair on its own lines and the drywall, framing and finishes the leak damaged on separate lines, so counsel can see which is which.
How California’s Right to Repair Act Handles It
California’s Right to Repair Act (SB 800) is in Civil Code section 895 and the sections that follow. It generally governs certain claims involving original residential construction intended to be sold as an individual dwelling unit, including homes with purchase agreements signed on or after January 1, 2003 (Civil Code 896 and 938). Counsel should confirm whether it applies to the particular project and claim.
Many of the Civil Code 896 standards are about water. Under 896(a), among others:
- Doors shall not allow unintended water to pass.
- Windows, patio doors, deck doors and their systems shall not allow water to pass beyond their moisture barriers. Window and door systems shall not allow excessive condensation to enter the structure and cause damage to another component.
- Roofs, roofing systems, chimney caps and ventilation components shall not allow water to enter the structure.
- Decks, balconies and exterior stairs shall not allow water into the adjacent structure or allow unintended water within their systems that causes damage.
- Foundation systems and slabs shall not allow water or vapor into the structure so as to cause damage to another building component.
- Stucco, siding and exterior walls shall not allow unintended water to pass into the structure or beyond the moisture barriers. Exterior walls shall not allow excessive condensation to enter and cause damage.
- Plumbing, sewer and utility lines shall not leak.
- Showers, baths and related waterproofing shall not leak water into the walls, floors or other components. Waterproofing behind or under tile shall not allow water into walls or floors so as to cause damage.
Mold is not listed as its own standard. Civil Code 897 says the standards are intended to address every function or component of a structure and that anything not addressed is still actionable if it causes damage. Civil Code 944 limits damages to specific categories. Those include the reasonable value of repairing a violation, repairing and rectifying damage resulting from the failure to meet the standards, reasonable relocation and storage costs and reasonable investigative costs for each established violation, among others.
Where mold is alleged to result from water intrusion, plumbing leakage, condensation or another condition covered by the Act’s performance standards, a claimant may seek to treat the mold-related repair work as damage resulting from the alleged violation. Counsel determines the right theory for the facts. Our job is to establish, with evidence, which component let the water in and whether it met the standard.
The Builder’s Defenses and Why Maintenance Records Matter
Civil Code 945.5 lists the affirmative defenses a builder can raise. Some cover acts of nature beyond code design criteria, time bars, releases and successful builder repairs. Three others track the line an investigator draws between construction and use:
- The homeowner unreasonably failed to minimize or prevent damage in a timely way, including failing to give timely notice or allow access for inspection and repair.
- The homeowner did not follow the builder’s or manufacturer’s recommendations or commonly accepted homeowner maintenance obligations. For this one, the builder has to show it gave written notice of reasonable maintenance schedules.
- The damage came from alterations, ordinary wear and tear, misuse, abuse or neglect.
For a board or a homeowner, this means the maintenance file carries real weight. Records showing that gutters were cleaned, sealant was renewed on schedule and irrigation was kept off the walls help answer a maintenance defense. For a builder, the written maintenance schedule has to exist and has to have been delivered. For both sides, the physical evidence decides whether the water came through a construction defect or around a maintenance item. Whether a defense applies is for counsel.
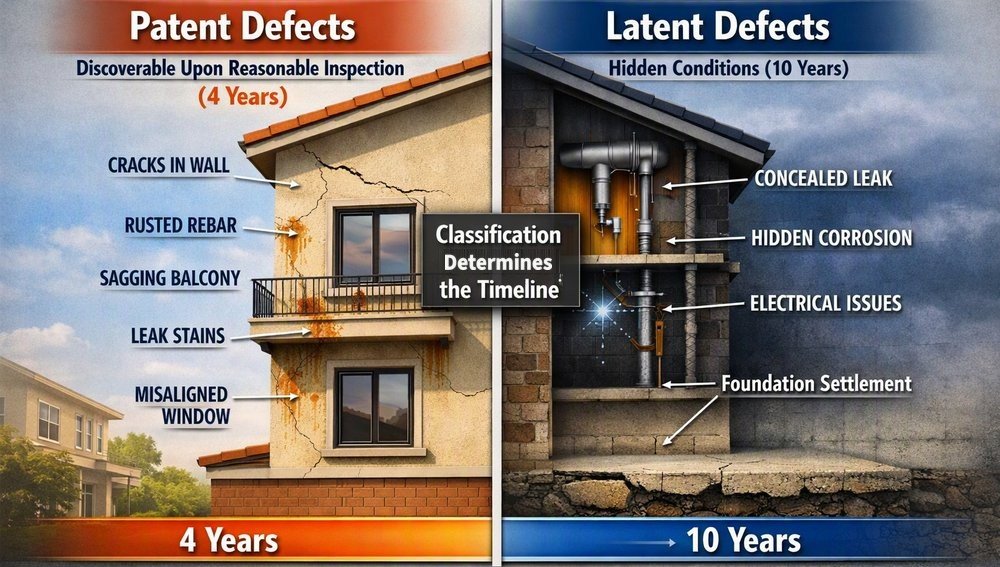
Timing matters as well. A leak that was visible for months before anyone reported it raises the failure-to-minimize defense. Our article on patent vs. latent defects covers why the visibility of a condition shapes how a case is built.
The Prelitigation Process
The Act requires a claimant to give the builder written notice before filing suit (Civil Code 910 and the sections that follow). The builder then has rights to acknowledge the claim, inspect the home and offer to repair (Civil Code 913, 916 and 917), each on deadlines set in the statute. Civil Code 941 sets outside time limits for bringing claims under the Act. Counsel should confirm the current deadlines and how they apply to the specific home before any notice goes out.
From the building side, a notice that names the water problem by component and location, with photos and moisture readings, gives the builder’s inspection something specific to look at. Other than urgent steps to stop active water and limit damage, preserve conditions until the builder’s inspection.
Health Codes and Remediation
Health and Safety Code 17920.3(a)(13) lists visible mold growth, as determined by a health officer or code enforcement officer, as a substandard housing condition. It excludes minor mold on surfaces that accumulate moisture as part of their properly functioning use. Health and Safety Code 26147, part of the Toxic Mold Protection Act, requires landlords to disclose known mold that exceeds permissible exposure limits or poses a health threat under the state health department’s guidelines. Landlords are not required to test.
On timing, EPA advises drying water-damaged areas and items within 24 to 48 hours to prevent mold growth. Emergency drying and containment should be coordinated so urgent mitigation does not needlessly destroy the evidence needed to find the source. For remediation practice, the industry reference is ANSI/IICRC S520, the Standard for Professional Mold Remediation, now in its 2024 fourth edition.
For questions about exposure or health effects, go to public health guidance from EPA and the California Department of Public Health.
What to Do When You Find It
If you own the home, the first steps are simple. Stop any active water you can find. Photograph everything as found. Do not repaint or bleach over it and call it done, because that hides the evidence and does nothing about the source. Check whether you have the builder’s homeowner manual and maintenance schedule and gather your maintenance records. Then talk to counsel about the notice process before any major demolition.
An HOA board’s first question is whether the source sits in a common area component or inside a unit. That split affects who is responsible for the investigation, the repair and the notice. If more than one unit shows the same pattern, investigate the pattern rather than each unit on its own.
Builders and their carriers should go to the inspection with a real investigator and a real question. If the source is occupant use, prove it with the interior data. If it is a construction item, deal with it through the Act’s repair process.
On any disputed source, bring in the investigator before remediation starts. Our construction defect expert witness services cover that work from the first inspection through the report. When a mold claim needs its source traced, contact PCC.
A Note on Sourcing
PCC is a construction forensics and construction management firm, not a law firm. Our role on mold files is the building side: where the water came from, whether it traces to construction or to use and maintenance and how to document the answer. The statutes are here only as context for why that work matters. Rely on your counsel for how the Right to Repair Act or any other law applies to a given home.
The Civil Code and Health and Safety Code sections were checked against the official California Legislative Information site in September 2026. Prelitigation day counts and the Civil Code 941 time limits are left out on purpose for counsel to confirm. The EPA guidance comes from EPA’s mold guide and the IICRC standard title was checked on the IICRC site.
This article provides general construction and regulatory context, not legal, insurance-coverage or medical advice. Laws and procedures change and may apply differently to a particular home or claim. Consult counsel, your carrier and a qualified environmental or health professional before acting.